Connecting the SX1302 LoRAWAN HAT
-
Enable I2C, SPI and UART. Edit the file
/boot/hw_intfc.confby running commandsudo nano /boot/hw_intfc.conf. And make the changes given below.intfc:i2c7=on intfc:spi1=on intfc:uart2=on # Uncomment the line intfc:dtoverlay=devspi1 -
Disable the UART debug serial, by editing the file
/boot/extlinux/extlinux.confsudo nano /boot/extlinux/extlinux.conf. And removingconsole=ttyS2,1500000n8fromAPPENDvariable.The edited line should look like below
APPEND earlycon=uart8250,mmio32,0xff1a0000 swiotlb=1 coherent_pool=1m earlyprintk init=/init -
Connect the SX1302 HAT to BrainyPi.
Compiling the SX1302 libraries
-
Install pre-requisites
sudo apt update sudo apt install git build-essential -
Clone the library from github
git clone https://github.com/shunyaos/sx1302_hal.git -
Compile the library
cd sx1302_hal make clean all make all -
Edit the file
tools/reset_lgw.sh, and change the variables given below- Original values
SX1302_RESET_PIN=23 # SX1302 reset SX1302_POWER_EN_PIN=18 # SX1302 power enable SX1261_RESET_PIN=22 # SX1261 reset (LBT / Spectral Scan) AD5338R_RESET_PIN=13 # AD5338R reset (full-duplex CN490 reference design) - Changed values
SX1302_RESET_PIN=145     # SX1302 reset
SX1302_POWER_EN_PIN=131  # SX1302 power enable
SX1261_RESET_PIN=149     # SX1261 reset (LBT / Spectral Scan)
AD5338R_RESET_PIN=76    # AD5338R reset (full-duplex CN490 reference design)
Note: This is done to make the library compatible with BrainyPi.
- Original values
-
Copy the
tools/reset_lgw.shscript to correct locationscp tools/reset_lgw.sh util_chip_id/ cp tools/reset_lgw.sh packet_forwarder/ -
That is it now the libraries are compiled and ready to use.
Connecting the LoRA concentrator to TTN
-
TTN is free LoRAWAN network.
-
To test if the SX1302 is working we connect to TTN and see if the data is being received.
-
Connect BrainyPi to internet using steps given here - Rbian OS | BrainyPi
-
First sign up on TTN and create an account.
-
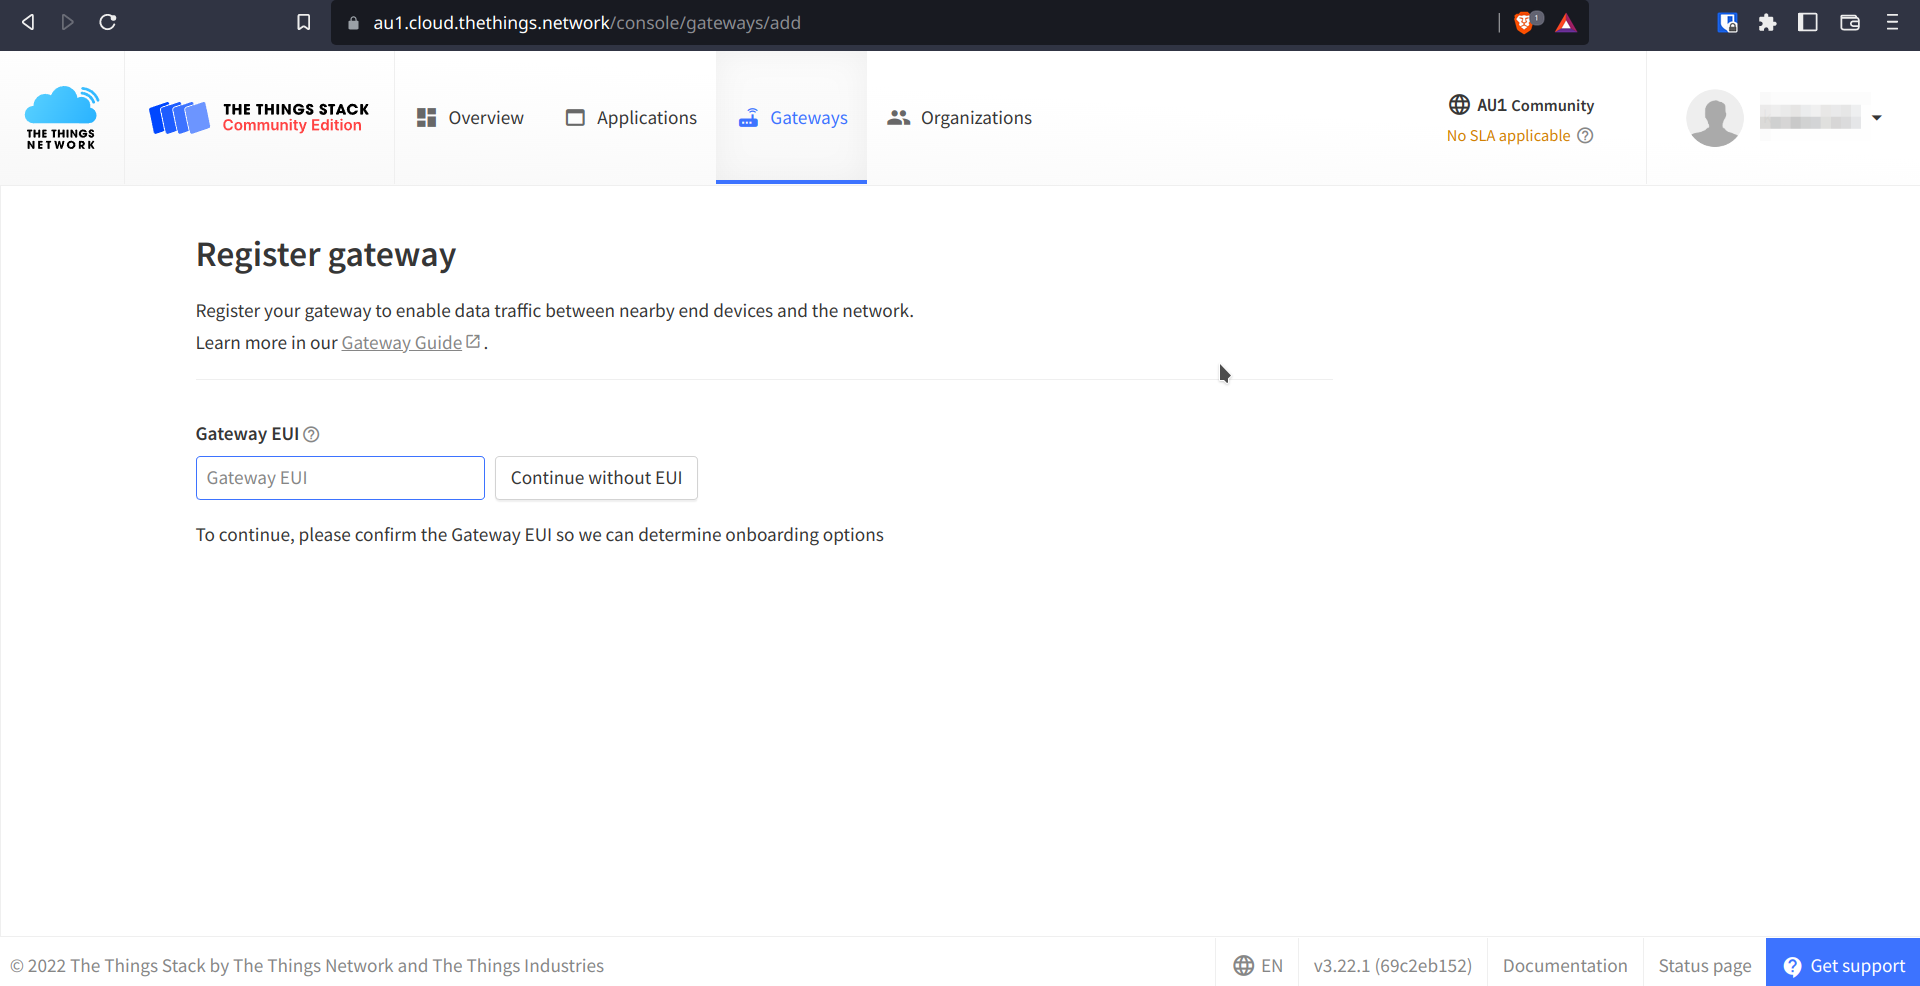
Then Go to Gateways and Register a Gateway.
-
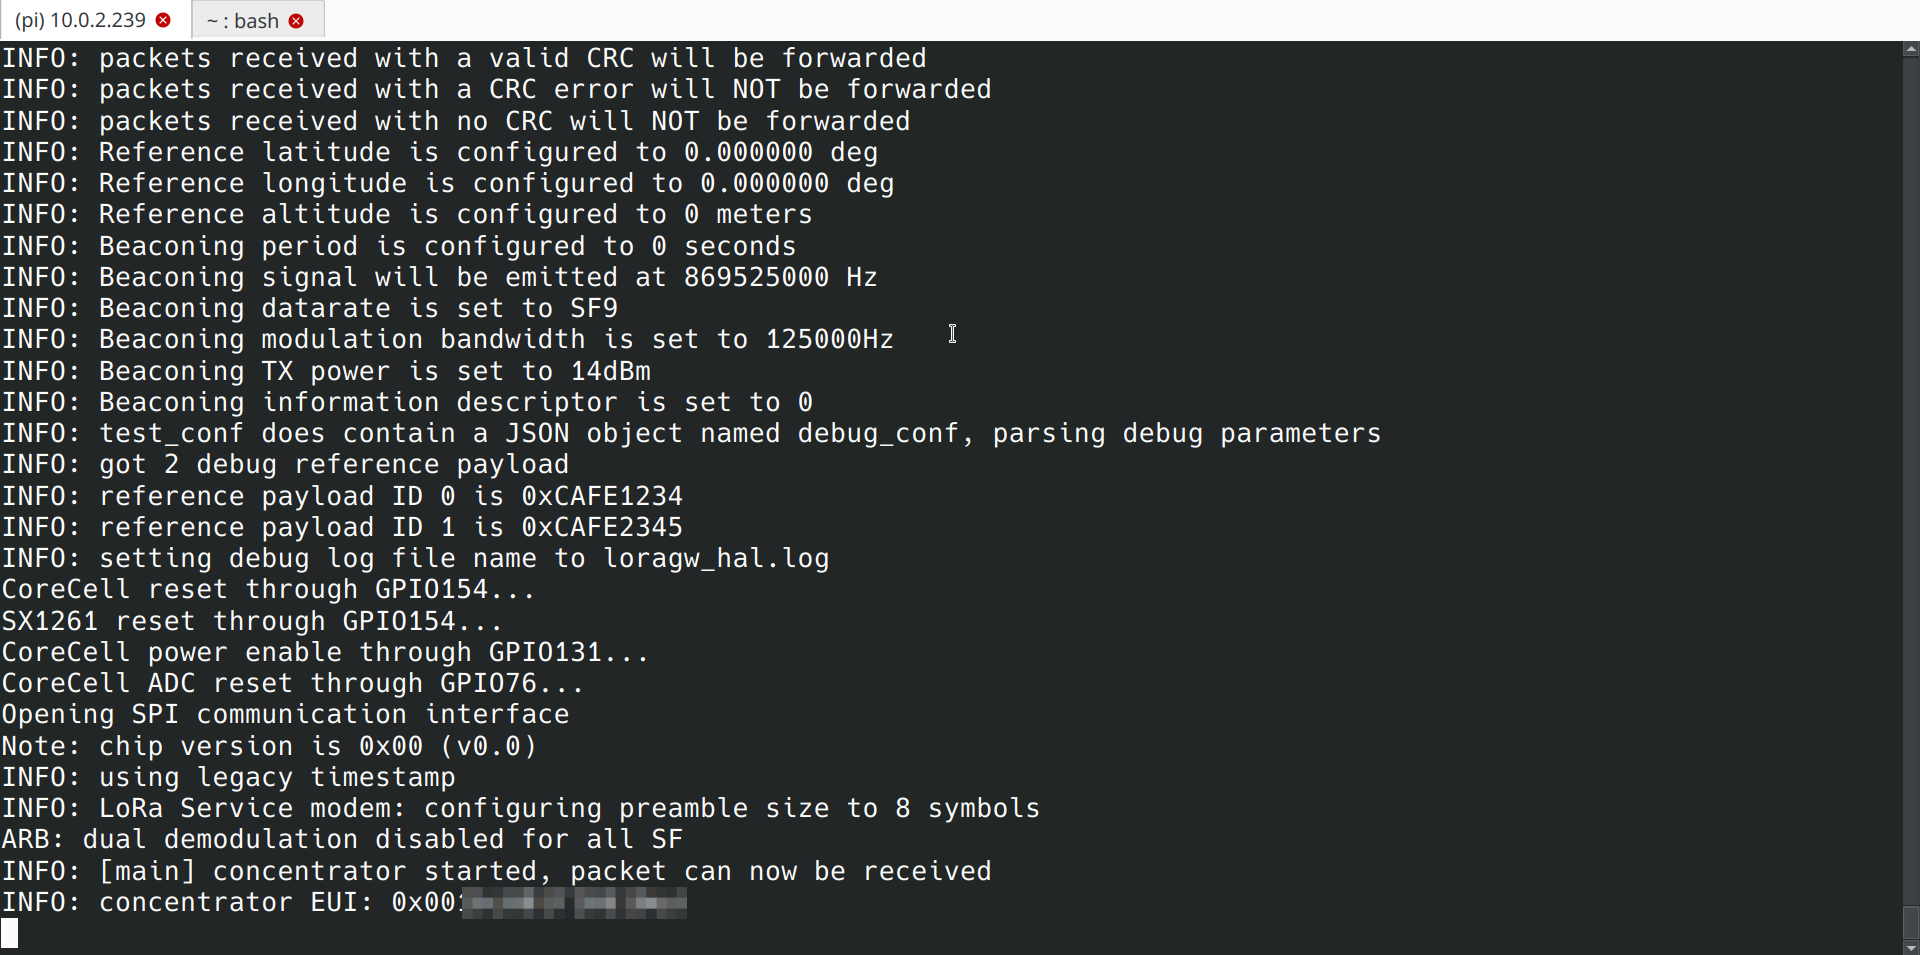
The register page asks for EUID of the SX1302 chip. To get the EUID we need to run command on BrainyPi.
cd util_chip_id sudo ./chip_id -
Copy the EUI and put it in the TTN gateway register page.
-
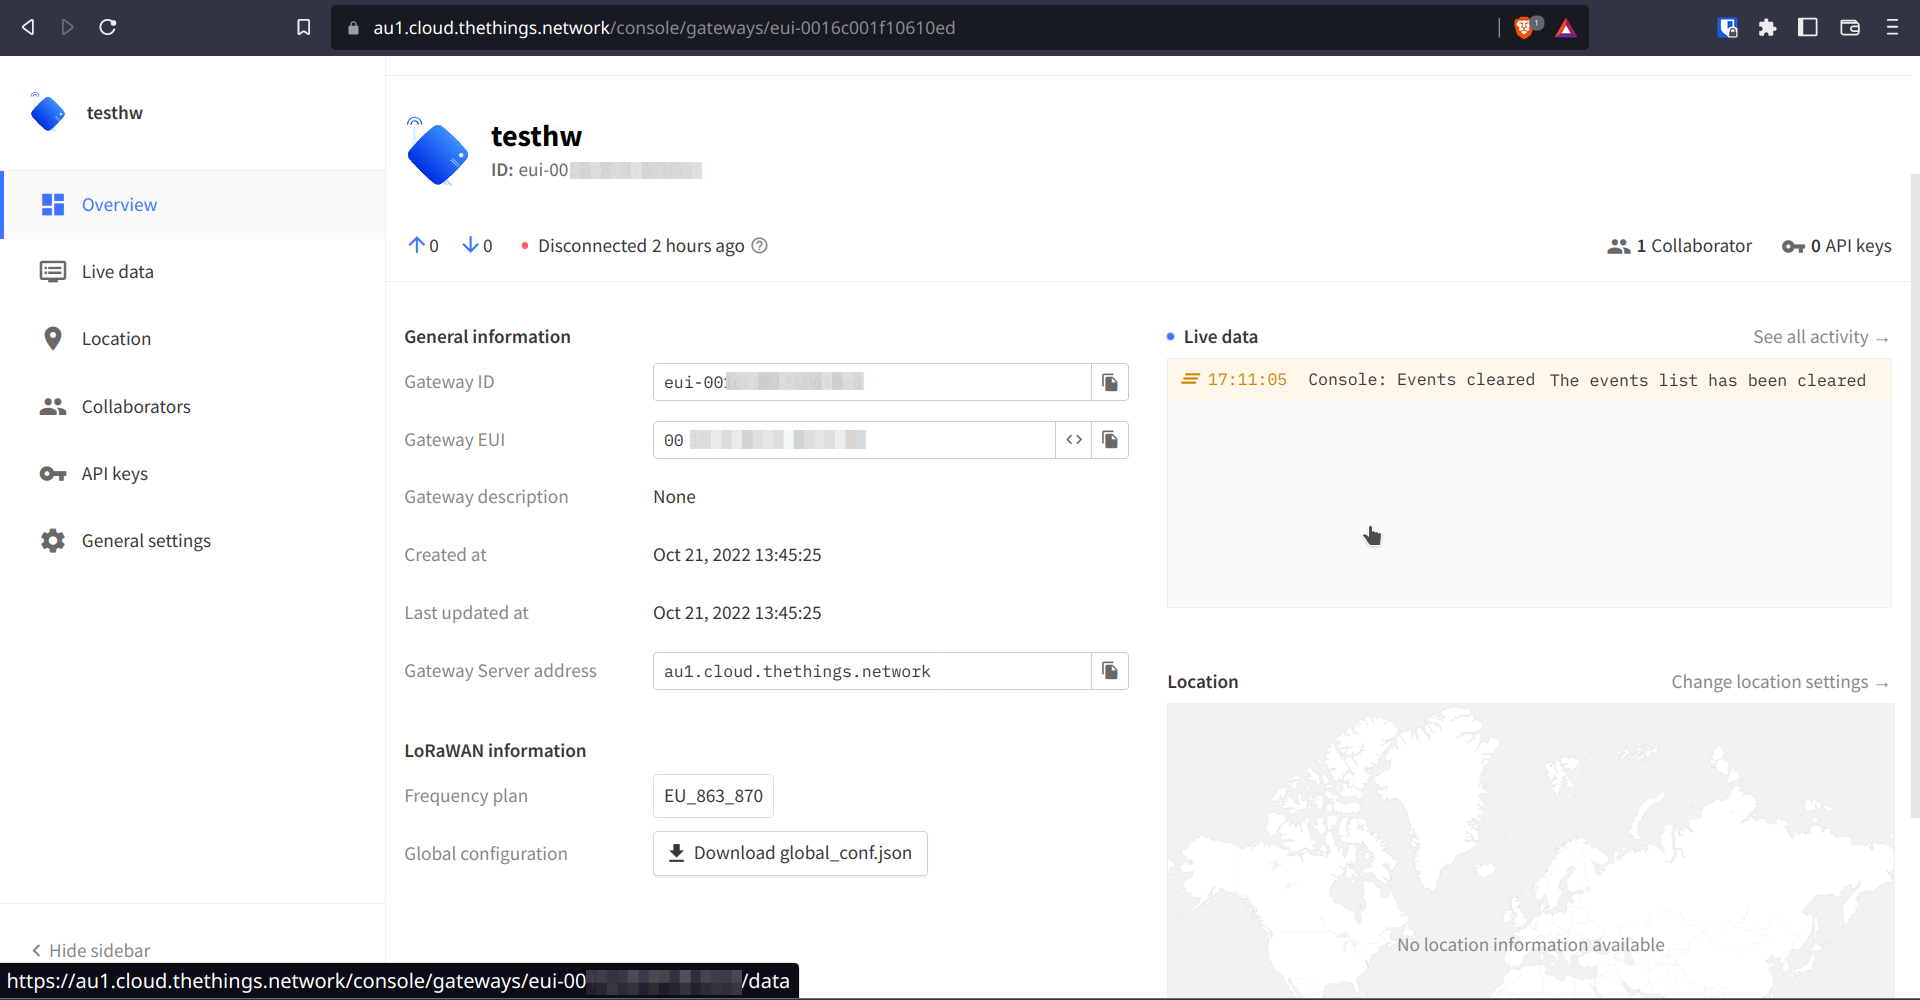
Download global_config.json.
-
Copy the sample packet_forwarder config file
global_conf.json.sx1250.XXXXX, WhereXXXXXis the frequency plan. In this example the Frequency plan is EU868.cd packet_forwarder/ cp global_conf.json.sx1250.EU868 test_conf -
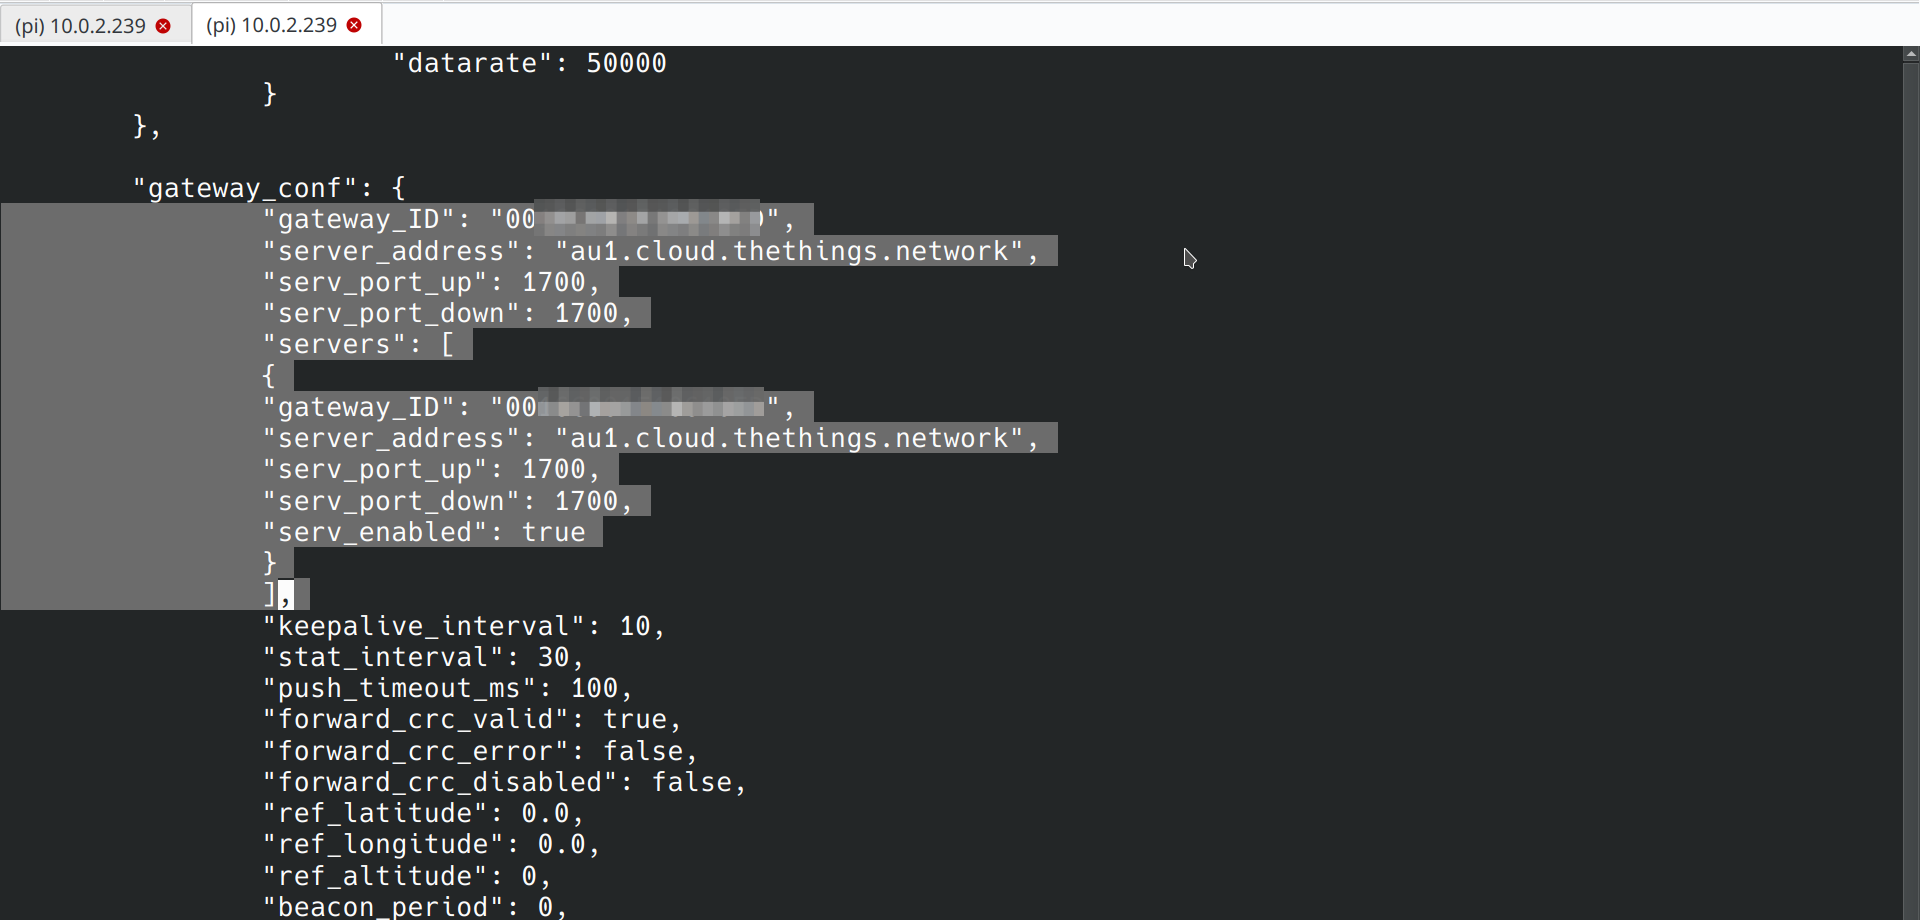
Open the global_config.json in an editor.
-
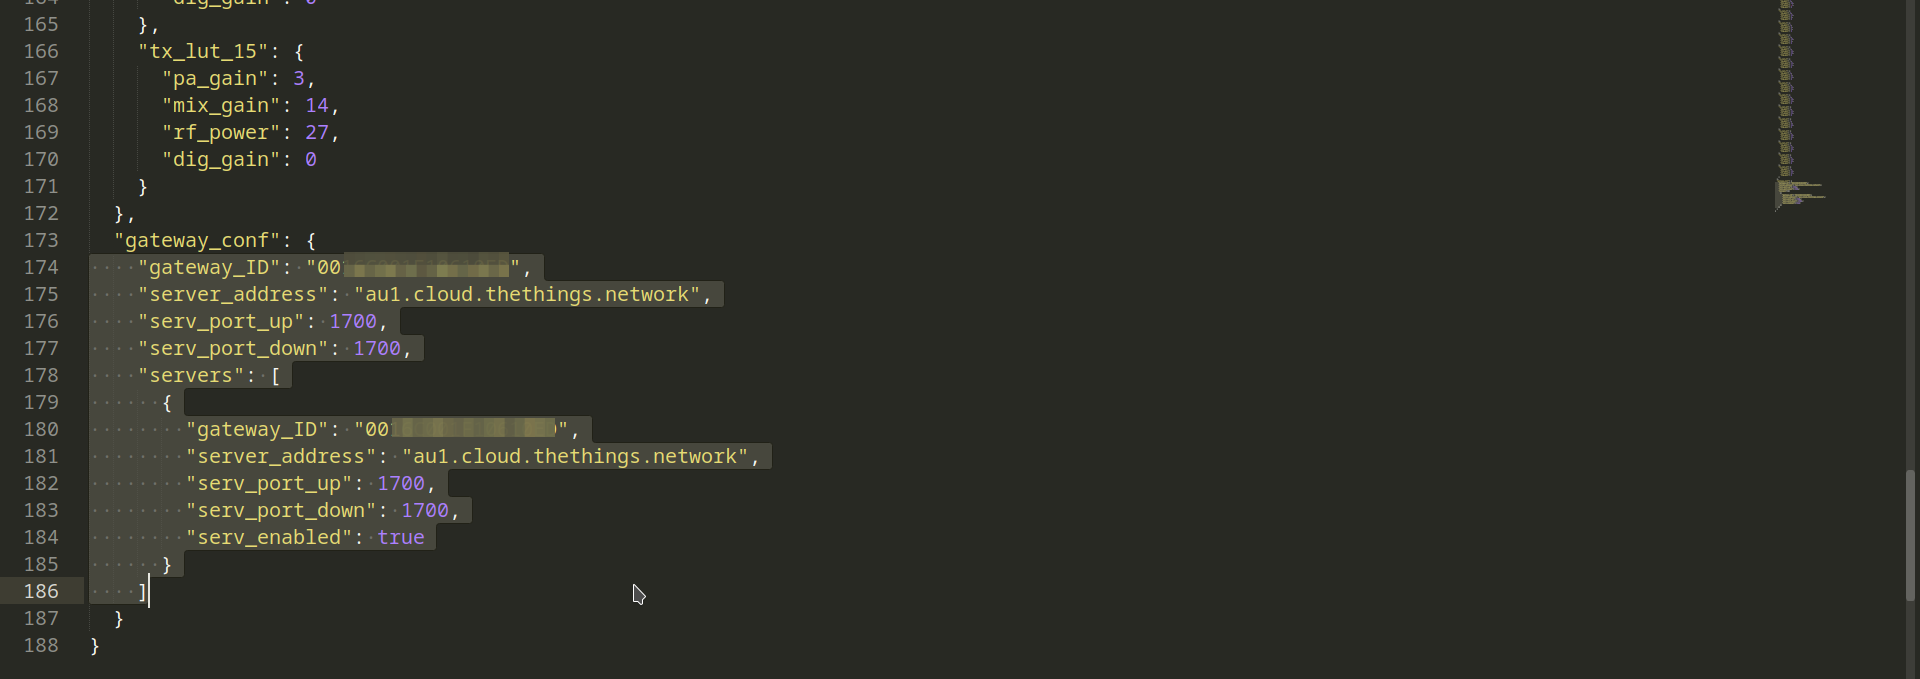
Copy the lines in the key
gateway_conf -
Open the file
packet_forwarder/test_confnano test_conf. -
Paste the lines copied from the
global_config.jsontotest_conf -
This will configure the LoRA concentrator to connect to TTN using the frequency plan.
-
Now start the packet forwarder
sudo ./lora_pkt_fwd -c test_confPacket forwarder starts sending data to TTN.
-
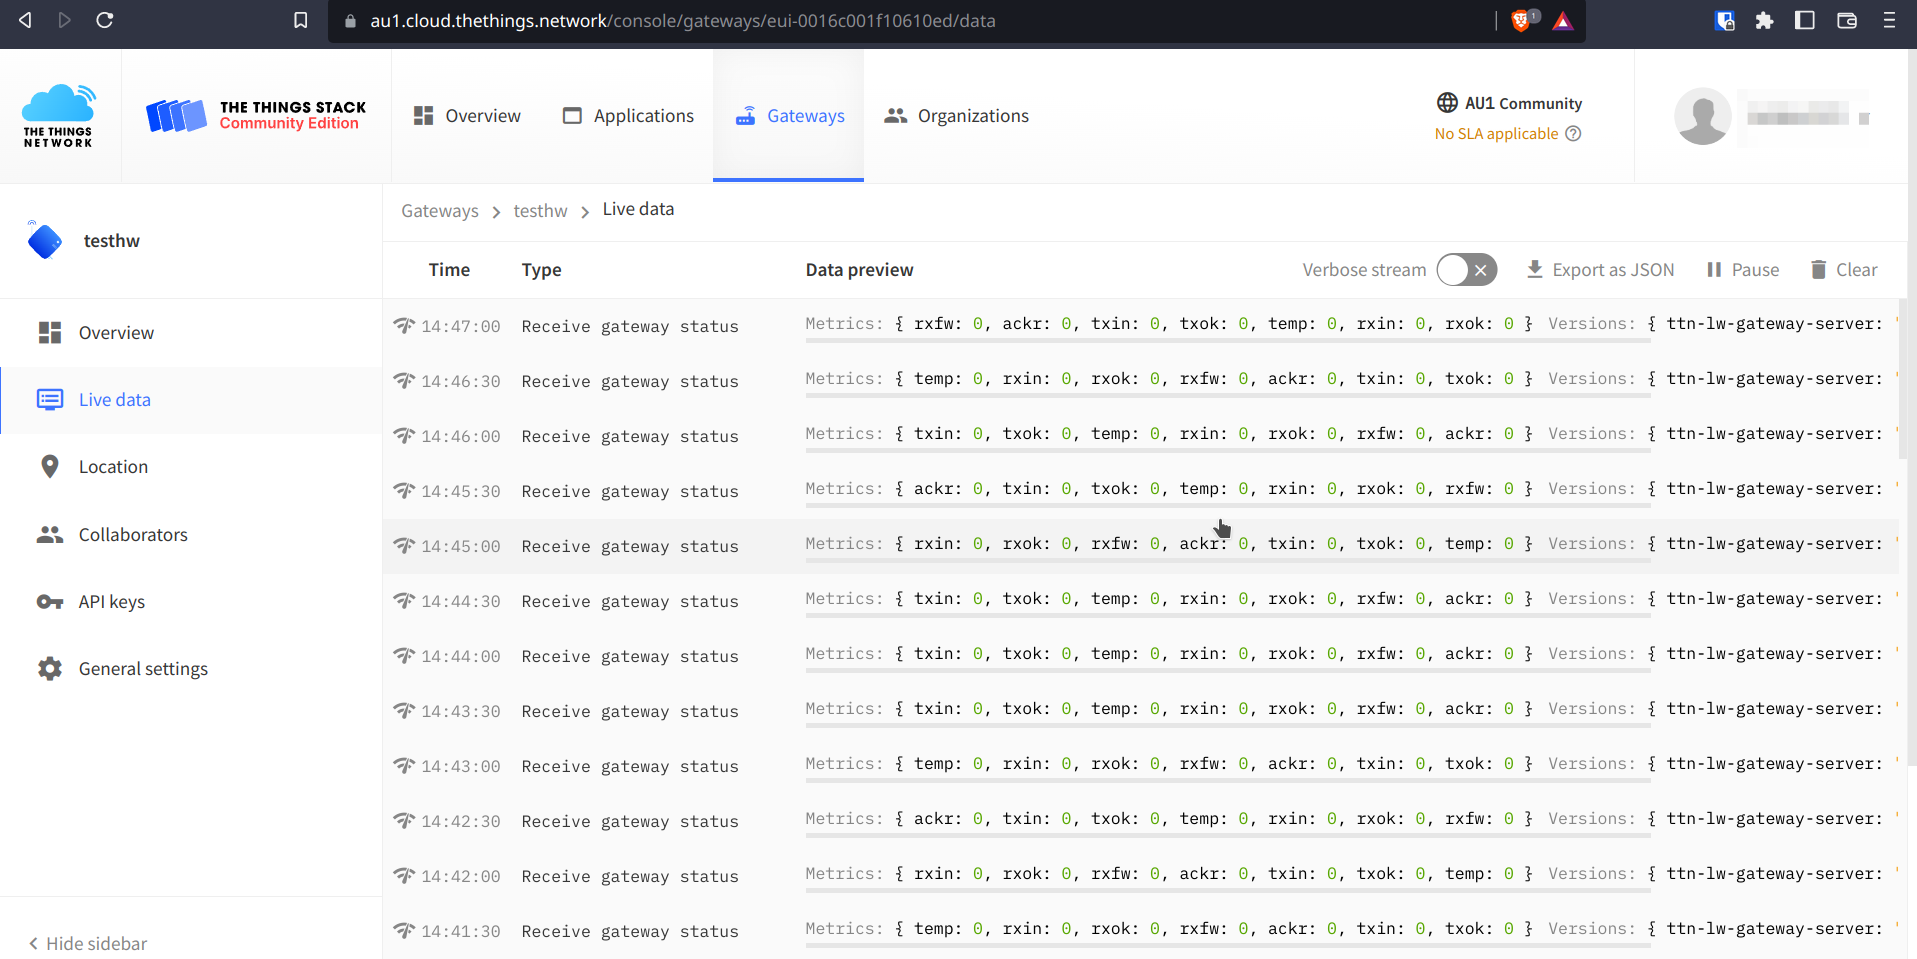
This data can also be seen in the TTN
Live Datasection -
Now your LoRA Gateway is running and is connected to TTN.


Troubleshooting
1. Running the command sudo ./lora_pkt_fwd -c test_conf gives error.
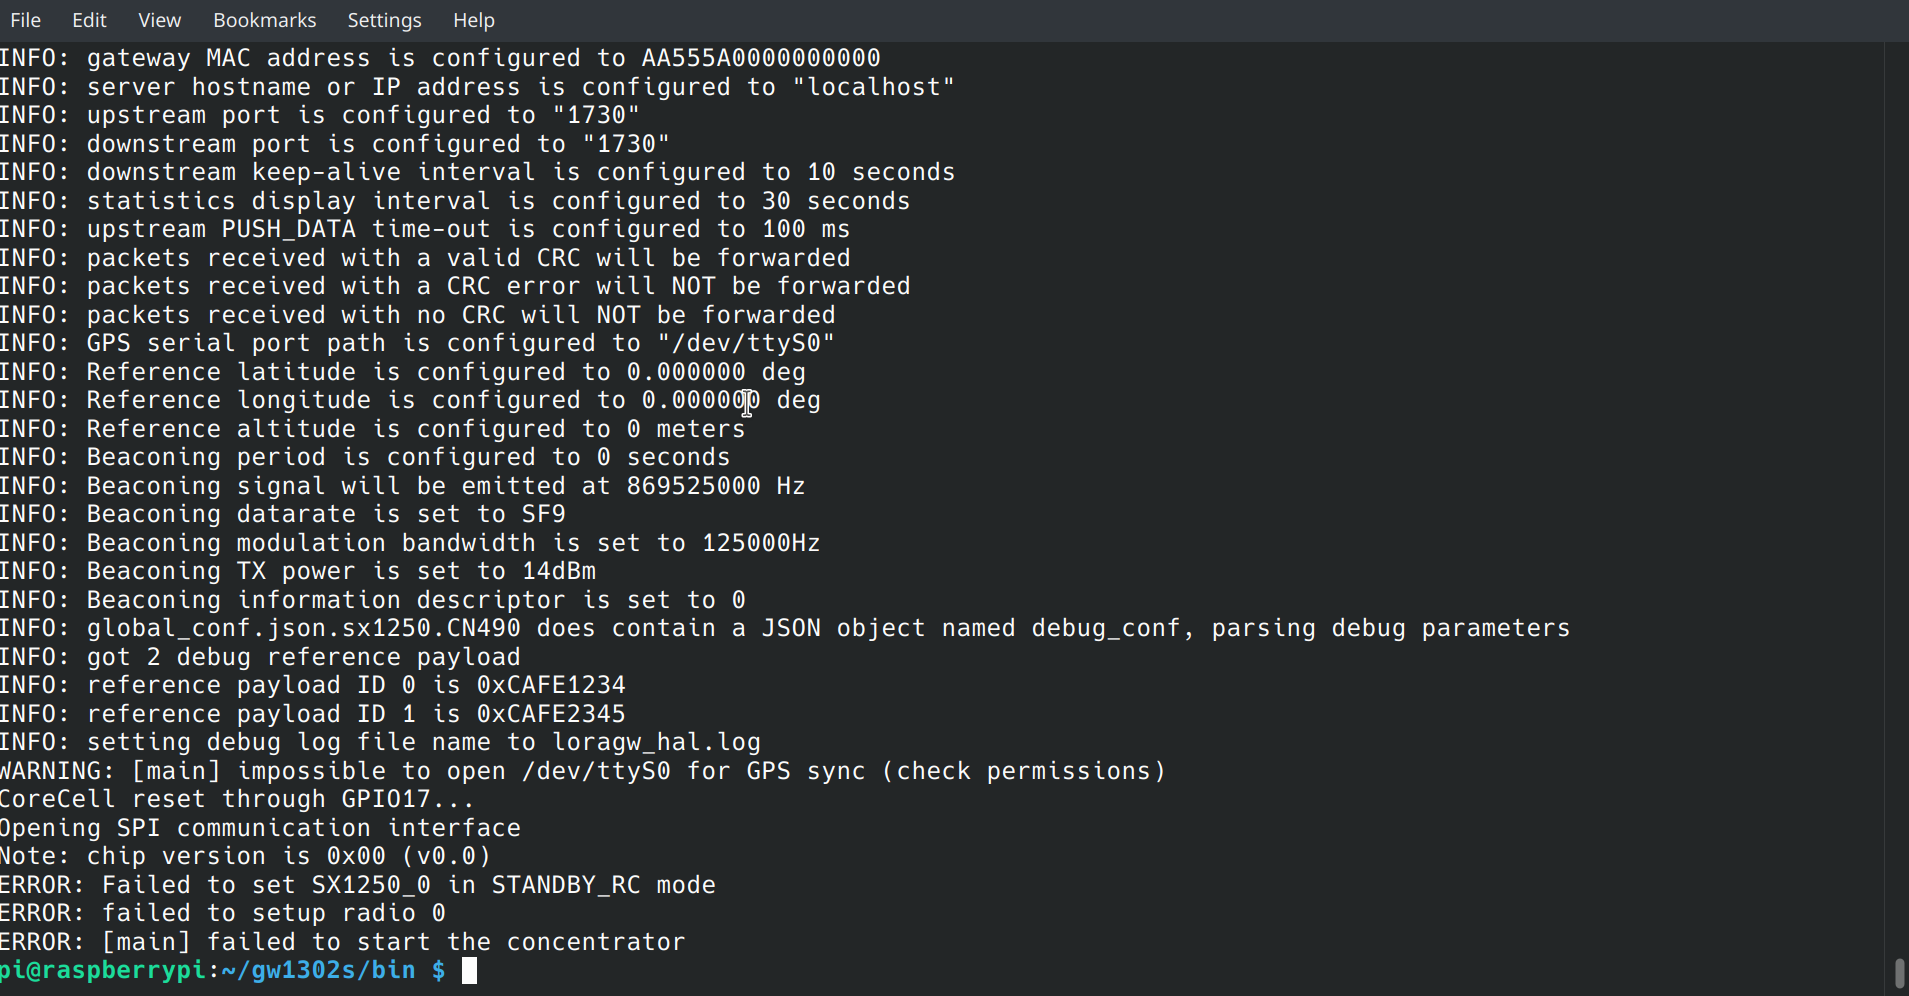
- This error is due to misconfigured RESET and POWER_EN GPIO pins in the file
tools/reset_lgw.s - Get the correct pinout from the HAT manufacturer.
- And correctly configure the file
tools/reset_lgw.s
2. Command sudo ./lora_pkt_fwd -c test_conf runs but TTN shows disconnected.
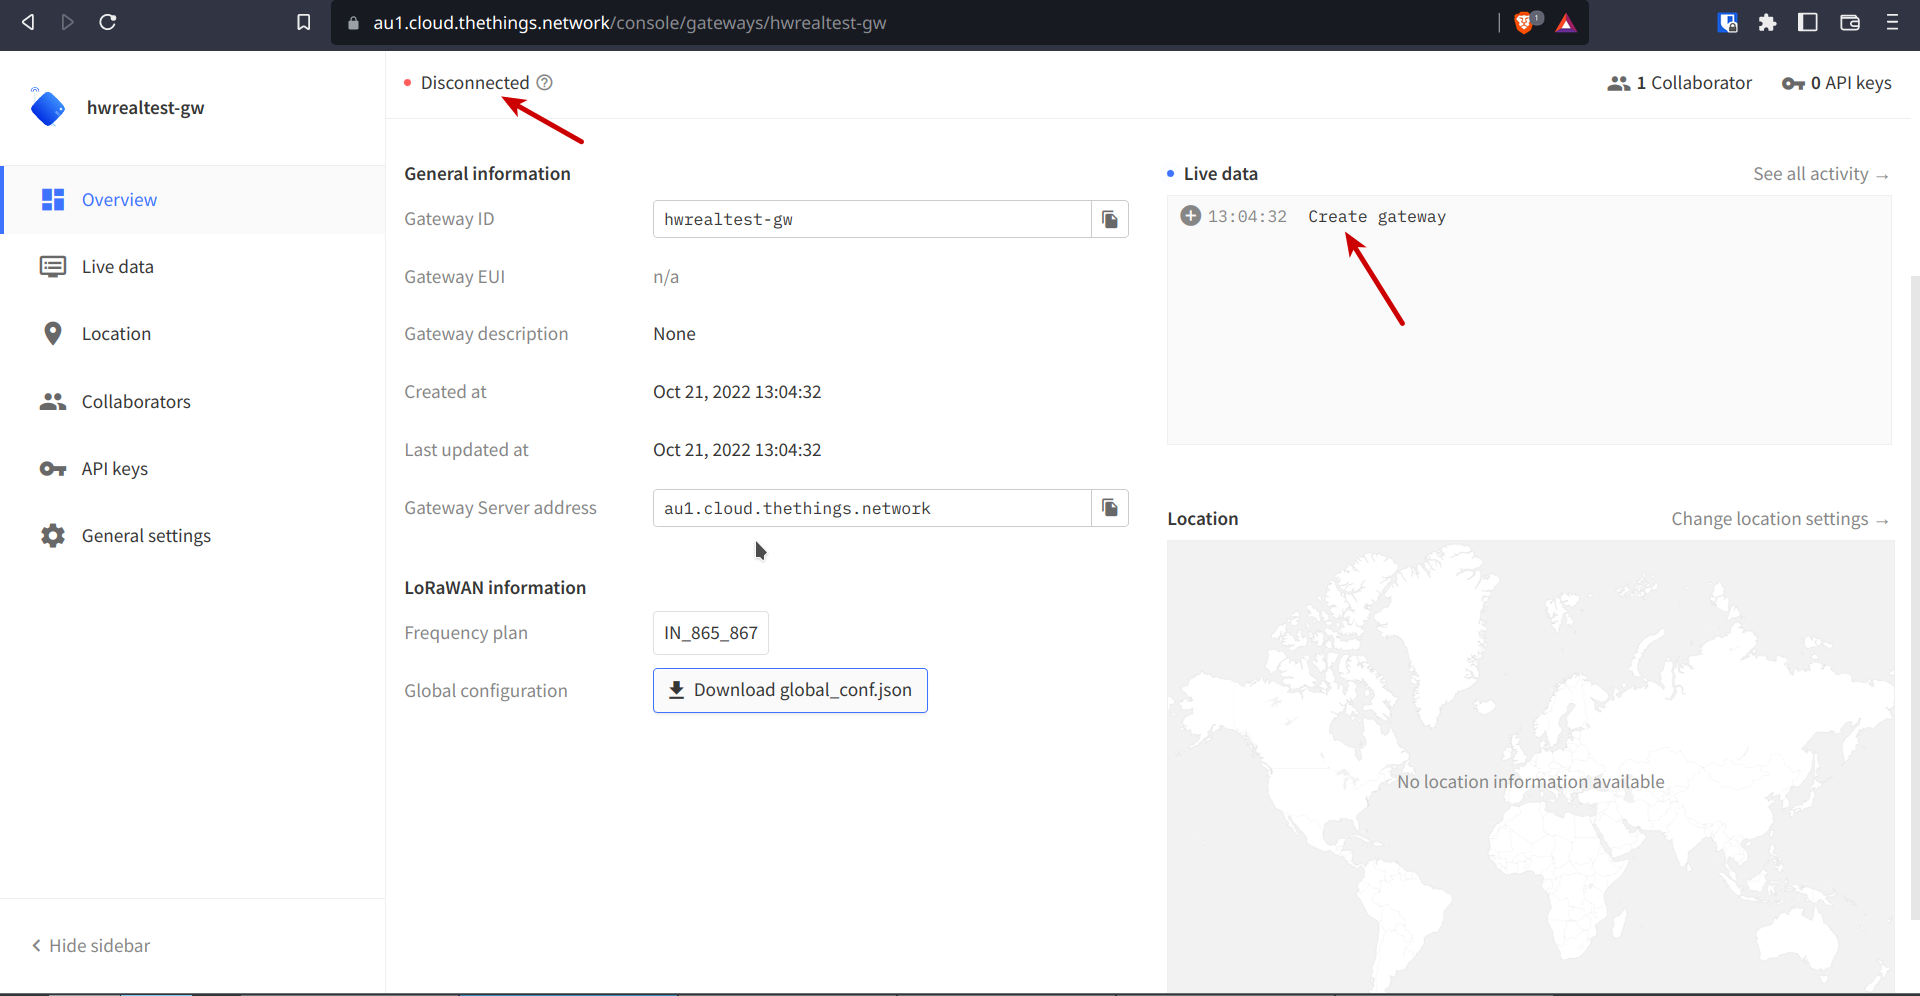
- Make sure that the LoRA gateway EUI is registered.
- Make sure that the frequency plan configured in TTN and in the packet_forwarder library matches.