Steps to create Wifi Access point on BrainyPi.
- Steps that followed are:
-
install hostapd and dnsmasq
# Install hostapd and dnsmasq sudo apt update sudo apt install dnsmasq hostapd # Disable hostapd and dnsmasq sudo systemctl stop dnsmasq sudo systemctl stop hostapd -
configure dhcpd
sudo nano /etc/dhcpcd.conf- add the lines
interface wlan0
    static ip_address=192.168.4.1/24
    nohook wpa_supplicant
sudo service dhcpcd restart - add the lines
-
configure dnsmasq
sudo mv /etc/dnsmasq.conf /etc/dnsmasq.conf.orig sudo nano /etc/dnsmasq.conf- add lines
interface=wlan0
dhcp-range=192.168.4.2,192.168.4.20,255.255.255.0,24h
sudo systemctl start dnsmasq - add lines
-
configure hostapd
- edit file
sudo nano /etc/default/hostapd - add line
DAEMON_CONF="/etc/hostapd/hostapd.conf" - edit file
sudo nano /etc/hostapd/hostapd.conf - add lines
interface=wlan0 driver=nl80211 ssid=BrainyPi hw_mode=g channel=6 ieee80211n=1 wmm_enabled=1 ht_capab=[HT40][SHORT-GI-20][DSSS_CCK-40] macaddr_acl=0 auth_algs=1 ignore_broadcast_ssid=0 wpa=2 wpa_key_mgmt=WPA-PSK wpa_passphrase=Admin@123 rsn_pairwise=CCMP - start hostapd
sudo systemctl unmask hostapd
sudo systemctl enable hostapd
sudo systemctl start hostapd
- edit file
-
configure Packet forwarding
-
edit file
sudo nano /etc/sysctl.conf -
add line
net.ipv4.ip_forward=1 -
set iptable rules
sudo iptables -t nat -A POSTROUTING -o eth0 -j MASQUERADE sudo iptables -A FORWARD -i eth0 -o wlan0 -m state --state RELATED,ESTABLISHED -j ACCEPT sudo iptables -A FORWARD -i wlan0 -o eth0 -j ACCEPT -
save the iptable rules
sudo sh -c "iptables-save > /etc/iptables.ipv4.nat" -
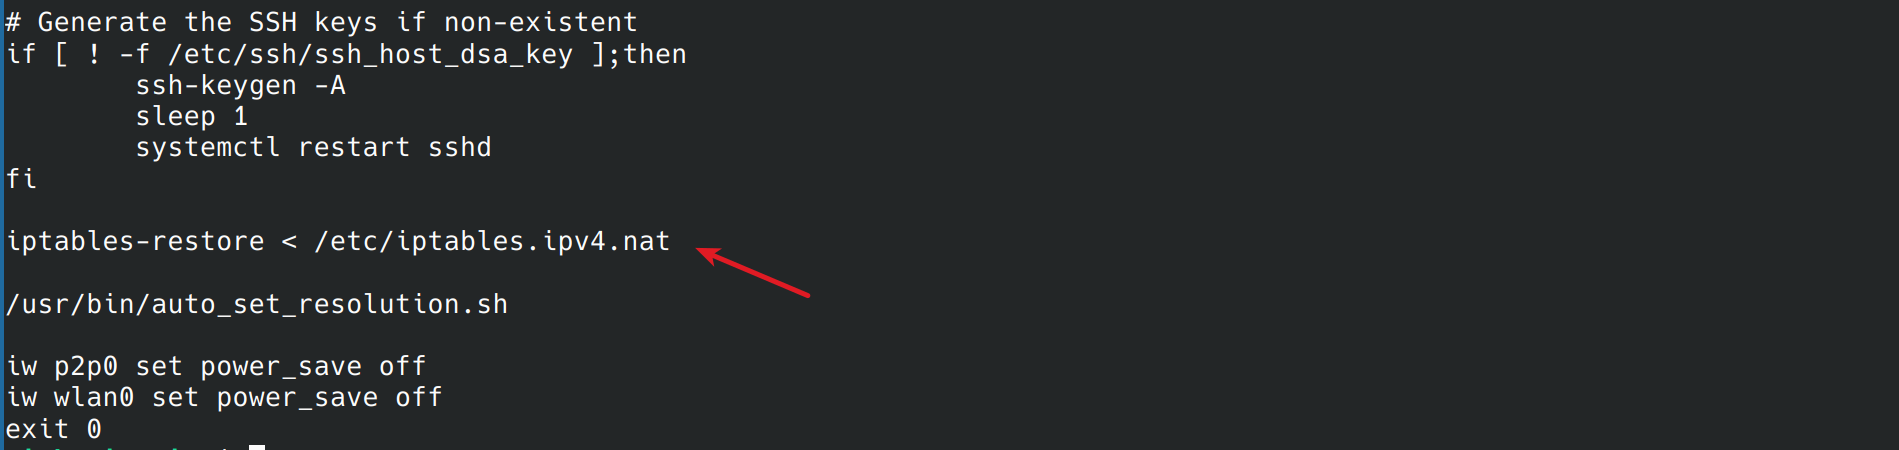
restore the iptable rules on startup
- edit file
sudo nano /etc/rc.local - add line
iptables-restore < /etc/iptables.ipv4.natabove exit
- edit file
-
-
reboot brainypi, run command
sudo reboot -
wireless access point is ready.
-